🧰 Module 00: Course Setup
Codename: OPERATION DEPLOYMENT READY
Time: 35 minutes
Scenario: Bit — the Contoso Helpdesk Agent
🎯 Learning Objectives
By the end of this module, you will be able to:
- Set up a Microsoft 365 account for Copilot Studio
- Activate a Copilot Studio trial and switch into the new agent-building experience
- Create a Power Apps Developer environment for testing
- Configure publishing permissions via the Power Platform Admin Center
- Prepare the SharePoint Tickets list and the two knowledge documents your agent will use
🧭 Overview
Before you can build agents in Copilot Studio, you need the right environment, the right permissions, and some data to ground your agent. This module walks you through a complete setup that supports every lab in this course.
You'll work with a single scenario throughout: building Bit — your Contoso IT help desk buddy. Bit is an AI assistant (the Contoso Helpdesk Agent) that helps employees resolve common IT issues (password resets, VPN problems, software requests) and logs a support ticket whenever a human needs to step in.
This course uses the new Copilot Studio experience — Microsoft's rebuilt agent designer with a new orchestrator and a single Build page. One of your first tasks is to switch into it.
By the end of this setup, you'll have:
- ✅ A Copilot Studio environment ready to build in, switched to the new experience
- ✅ Publishing permissions configured
- ✅ A Tickets SharePoint list and two knowledge documents to ground and action your agent
🧰 Prerequisites
- A Microsoft 365 account with admin permissions
(Business Basic trial is sufficient — we'll guide you through signup) - A web browser (Microsoft Edge or Chrome recommended)
- Willingness to experiment! This course is hands-on.
🧪 Step 1: Get a Microsoft 365 Account
If you already have an M365 account (work, school, or personal), you can use it for this course. If not, you'll need to sign up for a trial.
Option A: Use an Existing M365 Account
If you have an existing M365 account with admin permissions, you can skip to Step 2.
Note: You need admin permissions to create environments and configure publishing settings. If you're using a work account with restricted permissions, ask your IT admin to grant you the Power Platform Administrator role, or use Option B.
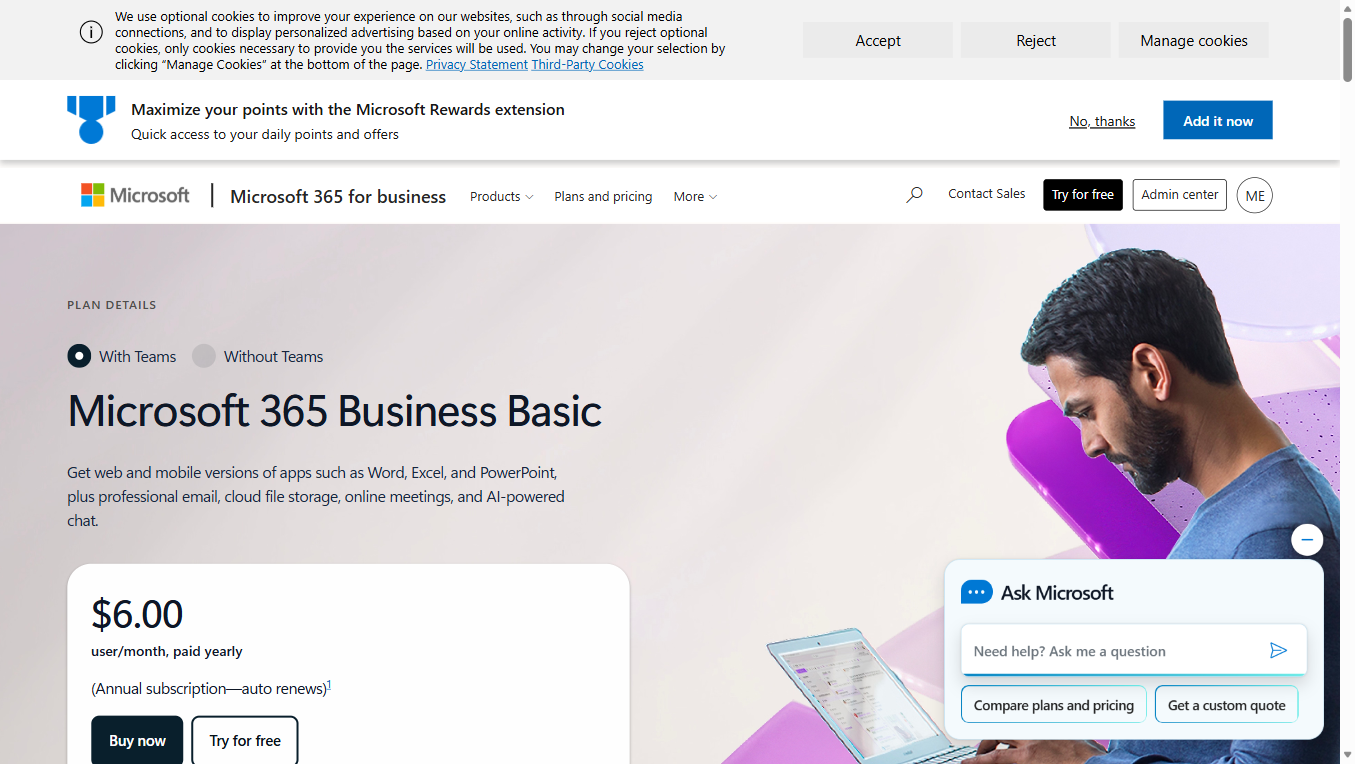
Option B: Sign Up for an M365 Business Basic Trial
- Go to Microsoft 365 Business Basic Trial
- Select Try for free
- Enter your email address (use a personal email)
- Follow the prompts to create a new account:
- Create a business name (e.g., "Contoso Learning")
- Set up your admin credentials
- Verify your phone number
- Complete the trial activation
- You'll receive admin access to a new M365 tenant
Time: ~5 minutes
🧪 Step 2: Start Your Copilot Studio Trial
Now that you have an M365 account, you can activate Copilot Studio.
- Open a new browser tab
- Go to https://aka.ms/TryCopilotStudio
- Sign in with the M365 account from Step 1
- Select your Country/region from the dropdown
- Select Get started
- Wait while Copilot Studio provisions your environment (~30 seconds)
- You'll land on the Copilot Studio Home page
✅ Checkpoint: You should see the Copilot Studio Home page with a description box prompting you to create an agent.
Time: ~2 minutes
🧪 Step 3: Switch to the New Experience
Microsoft rebuilt Copilot Studio. This isn't a UI refresh — it's a new agentic orchestrator and a new agent-building interface, with a new headline concept: Skills (reusable instructions written in markdown). This course uses the new experience only.
- On the Copilot Studio Home page, look in the top-right for Try it now and select it — this switches you into the new experience.
- Confirm the environment selector (top-right) points at your developer / sandbox environment, not production.
🔁 You can switch back to classic anytime with the same toggle. Existing classic agents still open in the classic designer; agents you create in the new experience always open in the new designer.
✅ Checkpoint: You are in the new experience — the agent you create later will open on a single Build page (Instructions, Knowledge, Skills, Tools, Memory, Connected agents, and Model all in one place).
What actually changed
Say this out loud before you build — it resets any classic-era muscle memory:
- No topics, no trigger phrases. The new experience uses Skills and Workflows instead. You describe behavior; the orchestrator decides what to do.
- Enhanced orchestration by design. In classic, orchestration was a toggle. In the new experience, every agent uses the improved deep-reasoning orchestrator — there's no setting to flip.
- No migration path. You can't move agents between classic and new (either direction). You build net-new here.
- Everything on one Build page. Instructions, Knowledge, Skills, Tools, Memory, Connected agents, and Model live together.
📚 Microsoft publishes a Classic vs. new agent experience comparison if you want the full list of differences.
Time: ~3 minutes
🧪 Step 4: Create a Power Apps Developer Environment
For full testing and publishing capabilities, you'll create a dedicated developer environment. This is free and gives you isolated resources for learning.
4.1: Sign Up for the Power Apps Developer Plan
- Go to https://powerapps.microsoft.com/developerplan/
- Select Get started free
- Sign in with the same M365 account
- Accept the terms and select Get started
- A new developer environment will be created (this takes ~2 minutes)
4.2: Verify Your Environment
- Go to https://admin.powerplatform.microsoft.com
- Sign in if prompted
- In the left navigation, select Environments
- You should see at least two environments:
- (default) or Contoso (default)
- [Your Name]'s Environment (the developer environment)
✅ Checkpoint: You have a developer environment listed in the Power Platform Admin Center.
Time: ~5 minutes
📢 Step 5: Enable Publishing Permissions
To publish agents to Microsoft Teams or other channels, you need the Copilot Studio Authors role. This is configured in the Power Platform Admin Center using a security group.
Why this matters: Without this role, the Publish button will be disabled. This is a common blocker for trial users.
5.1: Create a Security Group
- Go to https://admin.microsoft.com (Microsoft 365 Admin Center)
- In the left navigation, expand Teams & groups → select Active teams & groups
- Select the Security groups tab
- Select + Add a security group
- In the Set up the basics step:
- Name:
Copilot Studio Authors - Description:
Users allowed to publish Copilot Studio agents
- Name:
- Select Next
- In the Edit settings step, leave defaults and select Next
- In the Review step, select Create group
- Select Close after the group is created
5.2: Add Yourself to the Security Group
- In the Security groups list, select the Copilot Studio Authors group you just created
- Select the Members tab
- Select View all and manage members
- Select + Add members
- Search for your account, select it, and select Add (1)
- Select Close
✅ Checkpoint: You are listed as a member of the Copilot Studio Authors group.
5.3: Assign the Role in Power Platform Admin Center
- Go back to https://admin.powerplatform.microsoft.com
- In the left navigation, select Environments
- Select your developer environment (e.g., "[Your Name]'s Environment")
- Select Settings in the top toolbar
- Expand Users + permissions → select Security roles
- Select the Copilot Studio Authors role in the list
- Select + Add people (or Edit members)
- In the search box, search for the Copilot Studio Authors security group
- Select the group and select Add
- Select Save
✅ Checkpoint: The Copilot Studio Authors security group is assigned to the Copilot Studio Authors role in your environment.
Note: It may take 5–10 minutes for permissions to propagate. If the Publish button is still disabled later in the course, wait a few minutes and refresh the page.
Time: ~10 minutes
🧪 Step 6: Create the Tickets SharePoint List
Your agent's ticketing system is simply a SharePoint list. When an issue needs admin help, the agent will log a ticket here. Let's create the list and add a couple of sample rows.
6.1: Create the IT Help Desk Site
- Go to https://www.office.com and sign in
- Select the App launcher (nine dots) in the top-left corner
- Select SharePoint
- Select + Create site → Team site
- In the site creation wizard:
- Site name:
IT Help Desk - Site description:
Internal IT help desk — ticketing and resources - Privacy settings: Private (only members can access)
- Site name:
- Select Next, confirm you're listed as owner, and select Finish
✅ Checkpoint: You have a SharePoint site called IT Help Desk.
6.2: Create the Tickets List
- On the IT Help Desk site home page, select + New → List
- Select Blank list
- Name:
Tickets - Description:
Support tickets logged by Bit, the Contoso Helpdesk Agent - Select Create
The list is created with a default Title column.
6.3: Add Columns to the Tickets List
The agent reads this list's schema at runtime to decide what to fill in, so the column names and choice values matter. Add the following columns:
- In the Tickets list, select + Add column for each row below:
| Column Name | Type | Configuration |
|---|---|---|
| Description | Multiple lines of text | Symptoms and details |
| Status | Choice | Choices: New, In progress, Resolved, Closed (default New) |
| Priority | Choice | Choices: Low, Normal, High, Critical |
| Category | Choice | Choices: Hardware, Software, Network, Access, Other |
| Requestor | Single line of text | Who raised the ticket |
The default Title column is reused as the one-line summary of the issue.
✅ Checkpoint: Your Tickets list has columns: Title, Description, Status, Priority, Category, Requestor.
6.4: Add a Couple of Sample Rows
Add 2–3 example tickets so the list isn't empty when you first test.
| Title | Description | Status | Priority | Category | Requestor |
|---|---|---|---|---|---|
| Cannot access finance drive | User reports no access to the shared finance folder | New | High | Access | jordan@contoso.com |
| Outlook crashing on launch | Outlook closes immediately after opening | In progress | Normal | Software | priya@contoso.com |
✅ Checkpoint: Your Tickets list contains at least two sample rows.
6.5: Copy the Site URL and List Name
- On the IT Help Desk site, copy the URL from the browser address bar. It should look like:
https://[yourtenant].sharepoint.com/sites/ITHelpDesk - Save both the site URL and the list name (
Tickets) — you'll point the Create item tool at them in Module 07.
🔎 Confirm before class (facilitators): open List settings and note the exact display + internal column names and choice values. In the new experience the agent reads the list schema itself, so the site URL + list name are what matter most.
Time: ~10 minutes
🧪 Step 7: Prepare the Two Knowledge Documents
Your agent grounds its answers in two documents you'll upload in Module 06. Download the ready-made copies — 📄 Contoso_IT_FAQ.docx and 📄 Contoso_Approved_Software_List.docx — and use them as-is, or recreate your own from the outlines below.
7.1: Contoso IT FAQ
A short FAQ the agent uses to answer everyday questions. Include:
- Help desk hours — Mon–Fri, 7:00 AM–7:00 PM local; high-priority issues monitored 24/7
- How to reach the help desk —
helpdesk@contoso.com, extension 4357 ("HELP") - Ticket response times, device enrollment, password policy, Wi-Fi, and software/data basics
7.2: Contoso Approved Software List
Explains the three distribution types — Self-service, Manager sign-off, and Not listed — and lists the approved apps:
| Application | Category | Distribution |
|---|---|---|
| Microsoft Power BI Desktop | Analytics & reporting | Self-service |
| Microsoft Visual Studio Code | Development | Self-service |
| Microsoft PowerToys | Utilities | Self-service |
| Microsoft Power Automate Desktop | Automation | Self-service |
| Microsoft Visio | Diagramming | Manager sign-off |
| Microsoft Project | Project management | Manager sign-off |
| Microsoft 365 Copilot | Productivity (AI) | Manager sign-off |
| Visual Studio Professional | Development | Manager sign-off |
These two documents drive several later scenarios: help-desk hours (Module 06), "Can I install Power BI Desktop?" → self-service (Module 06), and the manager-approval workflow for Microsoft Visio (Module 09). Keep the app names consistent with this table.
✅ Checkpoint: You have both documents ready to upload (Contoso_IT_FAQ.docx and Contoso_Approved_Software_List.docx).
Time: ~5 minutes
📋 Summary
Congratulations! You've completed the course setup. You now have:
- ✅ Microsoft 365 account with admin access
- ✅ Copilot Studio trial activated and switched to the new experience
- ✅ Power Apps Developer environment created
- ✅ Publishing permissions configured via security group and PPAC
- ✅ IT Help Desk SharePoint site with a Tickets list (Title, Description, Status, Priority, Category, Requestor) and sample rows
- ✅ Two knowledge documents ready to upload (Contoso IT FAQ, Contoso Approved Software List)
You're ready to start building agents!
🧠 Key Takeaways
- The new experience is a toggle away: Try it now switches you into the rebuilt designer — no topics, no triggers, enhanced orchestration by design.
- Publishing requires permissions: the Copilot Studio Authors role, assigned via a security group in PPAC.
- A SharePoint list is a ticketing system: the agent reads the list schema at runtime, so the site URL + list name matter most.
- Knowledge grounds the agent: the IT FAQ and Approved Software List drive the answers and actions you'll build next.
⏭️ Next Steps
In Module 01: Introduction to Agents, you'll learn what agents are, how they work, and the different types of agents you can build in Copilot Studio.
Course Navigation: Course Index | Next: Module 01 →